/ 0 comments

Update Device Firmware


Follow this comprehensive guide to easily update your Automed device, ensuring it operates with the latest features and enhancements for optimal performance.

How to update your firmware

For a smooth and successful firmware update on your Automed device, follow these step-by-step instructions designed to guide you through the entire process.

Before you start

Before proceeding with the firmware update on your Automed device, ensure you have gathered the necessary items needed to update the Automed Device firmware.

USB Type A to Micro B Cable

It's important to note that the required cable is often known as the old-style Android charging cable. However, ensure that the cable you use is a data cable and not just a charging cable, as only a data cable can facilitate the firmware update.

Windows PC or Laptop

The second essential requirement is a Windows laptop or PC operating on either Windows 8, Windows 10, or Windows 11. This device will be used for running the firmware update process.

    Step 1: Setting up the firmware updater.

    To install the Automed Firmware on your Windows laptop or PC, begin by downloading the Automed updater software.

    Note: If you have previously installed the Automed Firmware Updater, you can directly proceed to step 3.

    After downloading, extract the contents of the installation folder and open the file named 'DfuSe_Demo_V3.0.6_Setup.exe' to begin the installation process.

    Follow the instructions on the setup screen to finish the installation. After the installation is complete, launch the DfuSe Demo program and leave it open on your screen as we proceed with the next steps.

    Step 2: Setting up the Device Driver

    Before updating your device's firmware with the Updater software, it's essential to confirm that the Device driver is properly installed. To ensure everything is functioning correctly, please follow the next steps carefully.

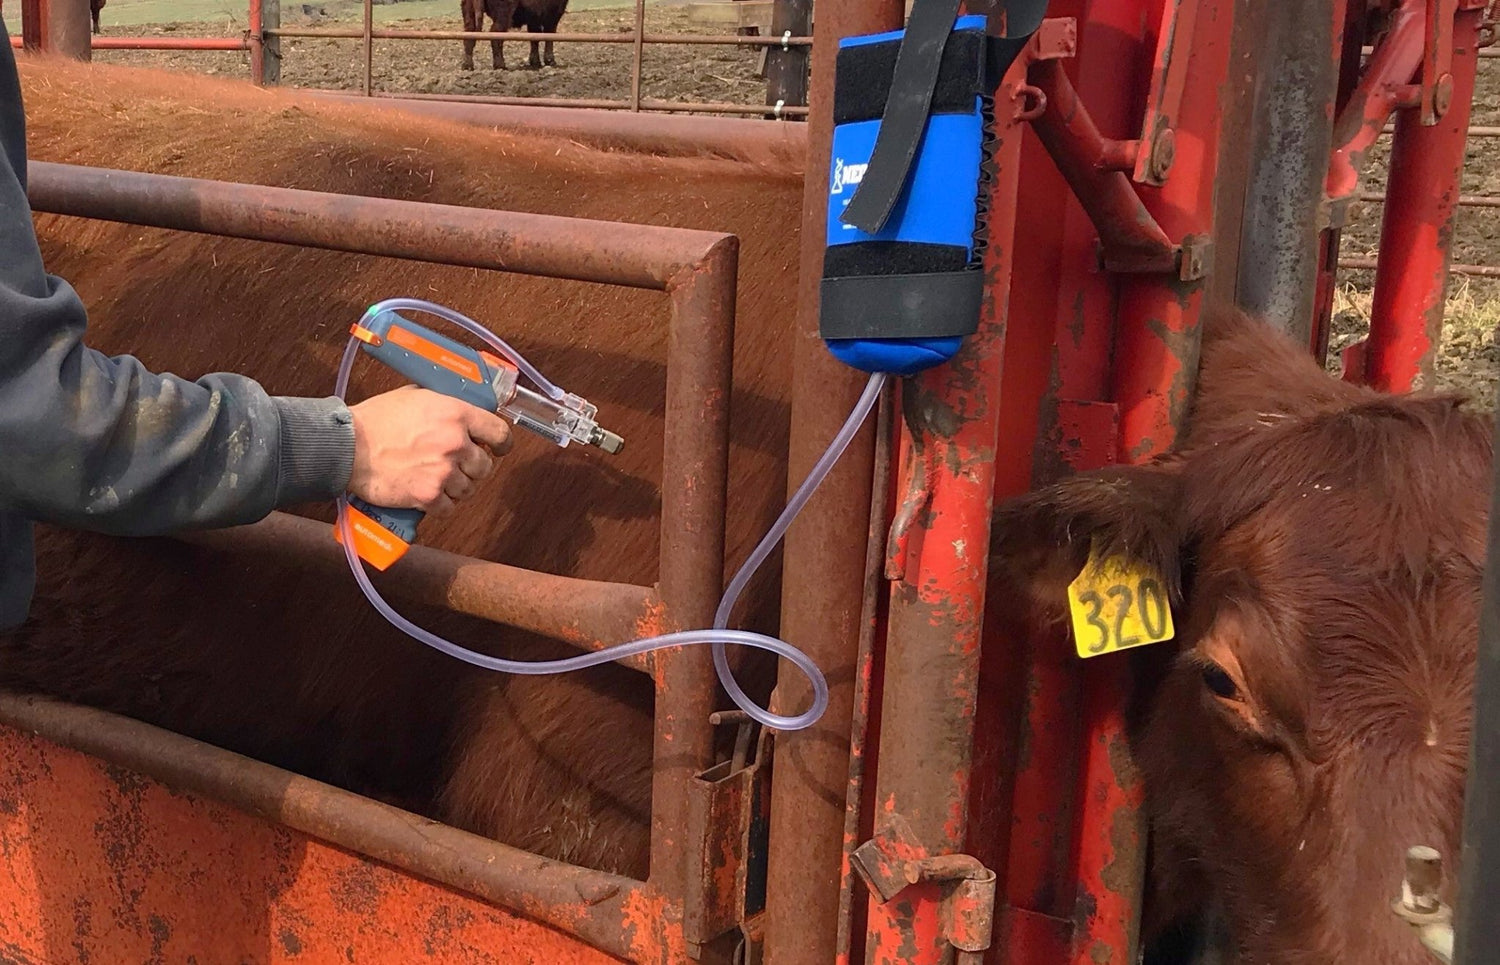
    Connect the USB cable to the device

    Take your Micro B USB cable and connect it to the USB port located at the bottom of the device, as illustrated in the image below.

    During this process, ensure that your cable is not connected to your device or computer.

    Connecting the USB Cable to the PC

    With your finger holding down the trigger, using your other hand plug the other end of the USB cable into the PC


    While pressing down on the trigger with one finger, use your other hand to insert the other end of the USB cable into the PC. After connecting, continue to hold the trigger during the countdown process.


    Continue holding down the trigger and wait for the countdown to complete. Once it's finished, the subsequent screen will appear as indicated.

    After the screen appears on your device, navigate to the DfuSe Demo program and check to see if the device is displayed as illustrated in the example below.

    If the screen in the DfuSe Demo program appears blank and doesn't show the device, the next step will be to update the DfuSe Demo Driver. Please follow the subsequent instructions to carry out this update.

    Updating the DfuSe Driver

    While keeping the device connected and the DfuSe program open, navigate to the Windows Start menu and open the "Device Manager." If you're unable to locate the Device Manager directly, use the Windows search bar and type in "Device Manager" to find and open it.

    As soon as you open the device manager you will see a screen appear like the one below.

    As indicated above, navigate to "Universal Serial Bus Controllers" and look for the "STM Device in DFU Mode." If your device is not listed here, it's possible that you are using a USB cable meant for charging, not for data transfer. If this is the case, try using a different USB cable and repeat the connection process as previously outlined, or consider trying another cable altogether to establish a proper data connection.

    Once you locate the "STM Device in DFU Mode" in the list, right-click on it and select "Update Driver" to proceed with the driver update.

    Following the steps mentioned above, click on the specified item in the list. On the next screen, select the 'Browse' button, which will open up a file explorer. Here, you can navigate to and select the required driver for the update process.

    In the file explorer go to C: > Program Files (x86) > STMicroelectronics > Software >DfuSe v3.0.5 > Bin > Driver > Win 8.1 > x64

    Select the folder as shown and then press "OK".

    After clicking 'Next', the following screen will confirm that the driver has been successfully updated. Once this update is complete, you should see the Automed device appear in the DfuSe Demo program, as illustrated in the example below.

    If the device still doesn't appear in the DfuSe Demo program, you might need to restart your computer for the drivers to take effect. Note that while restarting your computer, you should disconnect the Automed device and then reconnect it once the computer has been restarted.

    Step 3: Updating your device firmware.

    Connect your device to your computer and verify that it is being recognized and displayed in the "Dfuse Demo Program."

    After ensuring that your device is connected and appearing in the Dfuse Demo Program, click on the "Choose" button, as indicated in the instructions below. This action will open a file explorer window, allowing you to select the latest firmware version you have downloaded. If you haven't downloaded the latest firmware yet, use the provided link to obtain it.

    Once you have selected the firmware update file, proceed by clicking the "Upgrade" button to initiate the firmware update process.

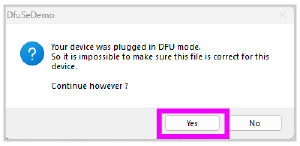
    Immediately after clicking the "Upgrade" button, a notification will appear. When this happens, click "Yes" to confirm and proceed with the firmware upgrade.

    Once you click "Yes," the firmware update process will automatically begin on your device. It's important during this time not to disconnect the device. Allow the update to complete fully without interruption.

    After the successful completion of the update, you are now ready to disconnect the cable from the device, insert the battery, and begin using your Automed Device. If you encounter any issues during the update process, please don't hesitate to reach out to our support team for further assistance.


    0 comments

    Leave a comment

    Please note, comments need to be approved before they are published.